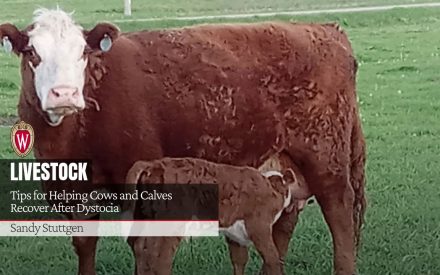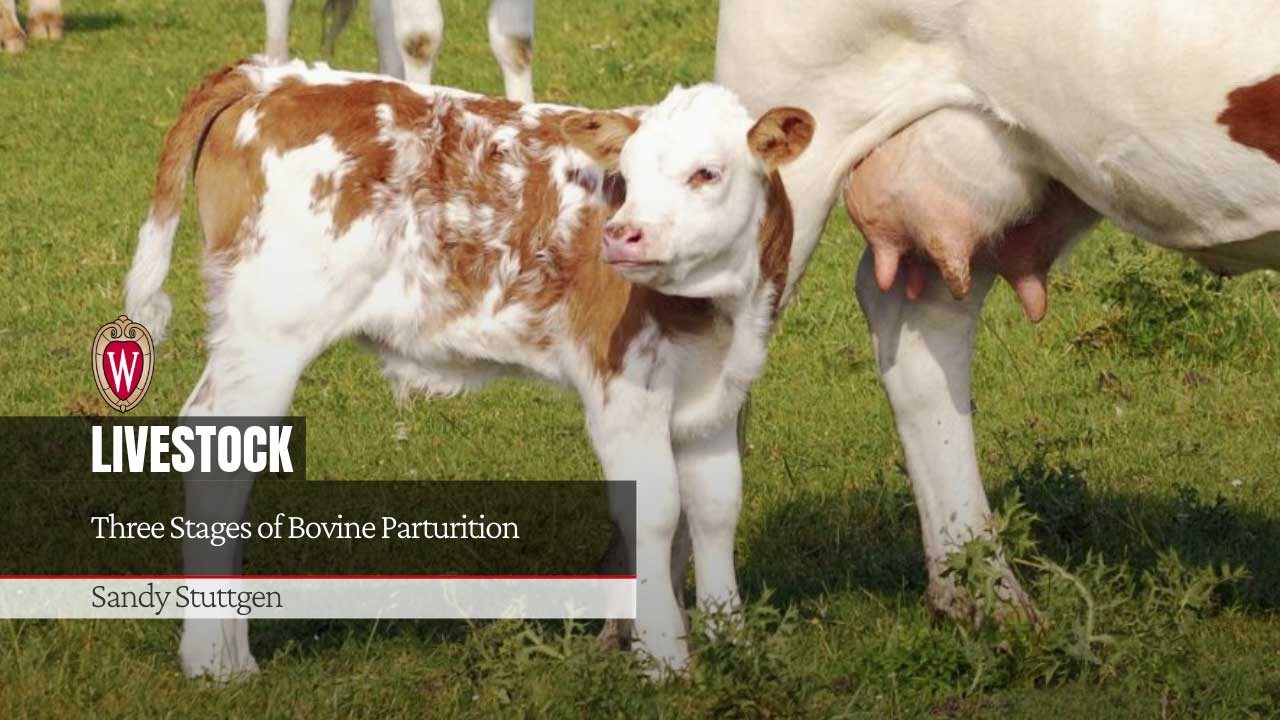
Introduction
There are three stages to the birthing process, or parturition: dilation of the cervix, delivery of the calf, and delivery of the placenta. Knowing the normal birth process will help you decide whether to intervene.
Stage 1: Dilation of the Cervix
You might not even notice this stage, which may take days to complete. Uterine muscular activity is quiet during this stage as the cervix softens, and the pelvic ligaments relax. At this time, a thick clear mucus (commonly referred to as a ‘string’) may hang from the vagina. The cow’s appetite decreases, and she may prefer to be off by herself. Uterine contractions begin by the end of Stage 1, pushing uterine contents against the cervix, causing further dilation.
Stage 2: Delivery of the Calf
Appearance of the water bag through the vulva signals the start of Stage 2 labor. The calf should be delivered within 2 to 5 hours of the appearance of the water bag. More recent research has found that healthy heifers with normal calf presentation will calve unassisted within 1 hour of the start of Stage 2; healthy cows with normal calf presentation calve within 22 minutes of the start of Stage 2.
So, when will cows need assistance? The decision to intervene is a matter of judgment, and judgment improves with experience. The cow that labors over an hour with the calf’s front feet and nose showing and no signs of further progress would certainly appreciate a little help. The cow that labors over an hour with nothing showing obviously needs help. You may feel uneasy watching a laboring cow when you don’t know when Stage 2 began. But don’t rush the process.
Conduct a vaginal exam to assess the presentation after watching for 20 to 30 minutes.
Begin by cleaning the cow’s vulva, rectum, and surrounding area under the tail as well as your gloved hands and arms with soap and water. Cleanliness is very important. Wear protective sleeves and apply obstetric lubricant to your gloved hands. Place your gloved hand in the vagina and feel for the cervix. If it is not dilated, it will feel as if your fingers are passing through a firm tube. Once dilated fully, you should no longer feel the cervical edge.
Can you put your hand on the calf? Is there straight- line access to touch it? Or does your hand have to turn or twist through folds of vagina to touch the calf? If so, a uterine torsion may be present, and you will need to call for veterinary assistance. You may be able to correct uterine torsions with instruction from your veterinarian and bit of practice, but this is something you should not try to correct for the first time on your own.
When assessing the calf’s presentation, determine its orientation in relation to the cow’s spine and find three things belonging to the same calf: two front feet with its head in between or two rear feet with its tail in between. If the presentation is normal, you may allow the cow to labor for 40 minutes to an hour, especially if the water bag is still present around the calf. If the water bag has broken, the calf should be delivered sooner (as long as the cervix is fully dilated).
When is it safe to pull a forward calf?
Start your assessment to determine if the calf is small enough to be delivered vaginally while applying traction with the pull of one person during a contraction. In the standing animal with the calf’s head completely in the pelvic cavity, you should be able to place a hand between the calf’s head and the cow’s backbone. You should also be able to feel both points of the calf’s shoulder 2 inches (three-fingers width) or less forward to the pelvic inlet.
In the recumbent animal you must be able to feel the points of the shoulder 2 inches or less forward of the pelvic inlet as traction is applied by one person.
When is it safe to pull a backward calf?
If you can’t see the hocks with one person pulling, extraction of a posterior presentation may not be possible. When the calf’s hip joints pass into the pelvic canal, its hocks will be visible about one hand’s width beyond the vulva. If you can’t extract the hocks, a pelvic mismatch is occurring; traction should be discontinued, and your veterinarian should be called.
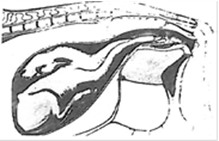
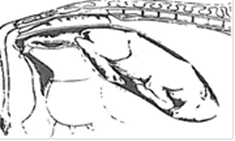
In attempting to correct a malposition, it is useful to list what can’t be done so you don’t waste time trying.
First, get the cow up and on her feet, restrained in a well-lit area that is safe for both you and cow to work in. It is much easier for you to work when both you and the cow are standing. There is more room for you to manipulate the fetus when the cow’s abdominal contents are not pushing up and against the pelvic canal. It may improve your reach if you stand on a firm, raised platform such as a hay bale or block.
- Don’t change an anterior position into a posterior one or vice versa—there usually isn’t enough room to do this without tearing the uterus.
- You can’t deliver an anterior presentation unless both legs and the head of the same calf are through the cervix. Sometimes only the legs are through and the head turns away. The head must be straightened, snared, or otherwise committed to the cervix before you continue traction.
- You can’t deliver a posterior presentation until you have both rear legs of the same calf in proper position.
- You can’t deliver three or more legs through the cervix. They may be from the same calf or from twins. The proper two legs have to be sorted out and the others pushed out of the way.
- Only rarely can you deliver a calf with just its head presenting. Take a few minutes to snare the head so you can keep track of it before you push it back into the uterus. Lubricate the head and push it back and bring the forelegs through the vagina. If the head is swollen and already delivered past the vulva, it may be easier to accomplish this by pushing on the shoulders. If the calf is dead, the head can be amputated to make room to get the legs through.
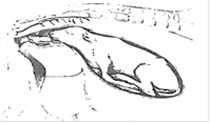
There may be times when you can’t get a veterinarian to help with a complicated delivery. The graphics depicted below provide some guidance.1 Whenever possible, however, get a veterinarian to help because the outcome is likely to be far better.
Stage 3: Delivery of the Placenta
The placenta should shed within 8 to 12 hours of the calf’s delivery. By definition, a retained placenta is one that is not shed after 12 hours. If retained, do not forcibly remove it. The cervix remains open as the placental membranes keep it open. This is a good thing, as healing occurs under aerobic conditions to slough the placenta out in 4 to 7 days. Administration of injectable antibiotics may be warranted if the cow develops a fever. Antibiotics and other supplements placed in the uterus to treat a retained placenta are ineffective and may cause violative drug residues in meat and/or milk. A uterine infection (pyometra) may result if pieces of fetal membranes become trapped behind a closed cervix.
Have your veterinarian conduct 30-day post-calving uterine examinations on those cows that experienced difficult calvings (and/or those whose calves you pulled) or retained placenta.


Author

Sandy Stuttgen
County Livestock Educator – Sandy is an associate professor with UW Division of Extension and serves as the agriculture educator for Taylor County. Her focus areas include cattle well-being and quality assurance programming, farm financial risk management, and farm succession.
Originally published: March 28, 2022
Revised: December 11, 2025
Reviewed by: William Halfman, Beef Outreach Specialist at UW–Madison Division of Extension and Ryan Sterry, Regional Livestock Educator at UW–Madison Division of Extension.
References
- N. Bruce Hayes, DVM. Keeping Livestock Healthy: A Veterinary Guide. (March, 1982). Garden Way Associates, Inc., 6th printing, pp. 61–67.